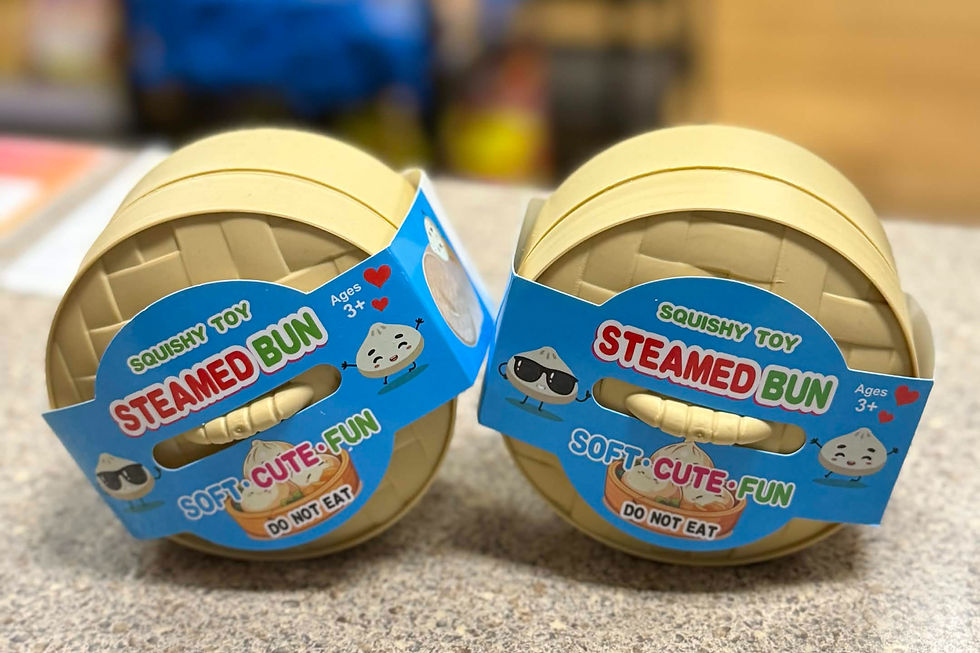
How to Make a Taba Squishy at Home: Silicone DIY Guide vs. Store-Bought


Quick answer: To make a Taba squishy at home, you cast soft two-part platinum liquid silicone (Part A and Part B) or TPR polymer into a silicone mold, then finish it with a powder coating to kill the tack. It is a fun project, but it is messy and time-consuming, so if you would rather skip the sticky work, ready-to-squeeze food-grade Taba squishies like dumplings, cheese, and butter are available at Niazi Bodega at 5138 UTSA Blvd near UTSA, or online through Bodega Blvd.
Below you will find a full DIY tutorial, an honest comparison of homemade versus store-bought, and a care guide to keep your squishies soft and lint-free. Whether you are a hands-on crafter or just want the satisfying squish without the cleanup, this guide has you covered.
What Is a Taba Squishy?
A Taba squishy is a soft, stretchy, slightly sticky sensory toy prized for its slow-rise squish and satisfying tactile feel. The most popular styles mimic food, like steamed dumplings in baskets, cheese blocks, and butter loaves.
The signature texture comes from soft silicone or TPR, which gives that pillowy, grippy squeeze. Making one at home is possible with the right materials, though getting the texture just right takes some practice.
If you want to skip the sticky DIY mess, you can grab pre-made Viral Taba Squishy Bundles directly from our online store. But if you love a good craft project, here is how to make your own.
How to Make a Taba Squishy at Home (5 Steps)
This method uses soft platinum-cure silicone, which is the most common approach for a durable, squeezable result. Read your specific product's label before you start, since ratios and cure times vary by brand.
Step 1: Gather Your Supplies
You will need:
Part A and Part B soft platinum-cure liquid silicone (look for a low Shore hardness for a squishier feel)
Silicone softener or deadener (optional, for an extra-soft, sticky squish)
Silicone pigment to color your squishy (a little goes a long way)
A silicone mold in your chosen shape (dumpling, cheese block, butter stick)
Mold release agent so the cast pops out cleanly
Flocking powder or cornstarch for the finishing coat
Mixing cups, stir sticks, gloves, and a scale for accurate measuring
One important tip: platinum silicone can be inhibited by latex gloves, certain modeling clays, and some adhesives, which can leave it sticky and uncured. Use nitrile gloves and a clean workspace, and work in a well-ventilated area.
Step 2: Mix Your Ratios and Remove Bubbles
Measure Part A and Part B precisely. Many soft silicones mix at a 1:1 ratio by weight, but some use 10:1, so always follow the label. Add your pigment and optional softener, then stir slowly and thoroughly, scraping the sides and bottom so it cures evenly.
Stirring introduces air bubbles. To remove them, the best tool is a vacuum degassing chamber. If you do not have one, mix gently, tap the cup firmly on the table to bring bubbles to the surface, and pour in a thin stream from a height to help them pop.
Step 3: Pour and Cure
Lightly apply release agent to your mold, then pour the silicone in a slow, thin stream to minimize new bubbles. Fill the mold completely and tap it a few times to settle the material.
Let it cure undisturbed. Cure times range widely, from about 30 to 60 minutes for fast-set silicones to 4 to 24 hours for others. Resist the urge to poke it early, since disturbing a partial cure can ruin the texture. Follow your product's recommended full cure time.
Step 4: De-Mold Without Tearing
Once fully cured, de-mold slowly. Soft silicone tears more easily than firm silicone, so patience matters here.
Gently flex and peel the mold away from the edges first.
Work around the whole piece before pulling it free.
Avoid yanking, which can rip thin or detailed areas.
If it resists, a little more release agent or a gentle stretch of the mold usually helps.
Step 5: Finish the Surface to Kill the Tack
Fresh soft silicone is sticky. To get that smooth, velvety Taba feel, coat the surface.
For a matte, non-sticky finish: dust the squishy all over with cornstarch and gently rub it in.
For a fuzzy velvet finish: apply flocking powder (electrostatic flocking gives the best coverage).
Buff off the excess and your squishy is ready to squeeze.
That is the full process. It is genuinely satisfying to make your own, but as you can see, it takes time, supplies, and cleanup.
DIY Taba Squishies vs. Pre-Made Store Bundles
Not sure whether to craft or buy? Here is an honest side-by-side.
Factor | DIY Taba Squishies | Pre-Made Store Bundles |
Cost of materials | Silicone, pigment, molds, and powder add up | One flat bundle price, no extra gear |
Prep and cure time | Hours of mixing, pouring, and curing | Ready to squeeze instantly |
Durability | Varies with your mix and technique | Consistent, factory-tested quality |
Tactile squish texture | Hit or miss until you dial it in | Reliable slow-rise squish every time |
Cleanup required | Messy, sticky, needs ventilation | None |
Best for | Crafters who enjoy the process | Anyone who just wants the squish |
The bottom line: DIY is a fun weekend project if you love crafting, but pre-made bundles win on convenience, consistency, and zero cleanup. Many people try the DIY route once, then keep a stash of store-bought squishies for everyday squeezing.
Taba Squishy Care & Maintenance Guide
Whether homemade or store-bought, Taba squishies pick up lint and get sticky with daily handling. Keeping them clean is simple.
Wash gently with mild soap. Use a little mild soap and lukewarm water to remove dust, oils, and lint from the surface.
Rinse and pat dry. Rinse thoroughly and press with a soft towel instead of rubbing.
Dust with powdered cornstarch. Once fully dry, lightly coat the squishy with cornstarch to restore that soft, velvety, non-tacky texture.
Store it clean. Keep squishies in a sealed bag or clean container between uses so they stay lint-free longer.
A quick clean every so often keeps them feeling brand new and satisfying to squeeze.
Prefer to Skip the Mess? Shop Local in San Antonio
If the DIY route sounds like more work than fun, you are not alone. Plenty of UTSA students and local crafters would rather grab a ready-made squishy and start squeezing right away.
Niazi Bodega on UTSA Blvd carries viral food Taba squishies in person, minutes from the UTSA campus and an easy drive from the Medical Center, Leon Valley, and Helotes. Want to see them first? Check out our local guide on Where to Buy Squishy Dumplings in San Antonio to pick them out in person.
Shopping local means you can feel the squish before you buy, skip shipping waits, and support a Northwest San Antonio shop all at once.
Try the DIY or Grab the Squish Today
Ready to get crafty? Round up your silicone and molds and give the DIY method a shot, it makes for a fun and satisfying project. Want the squish without the sticky cleanup? Come squeeze and pick your favorites in person at Niazi Bodega, 5138 UTSA Blvd, Suite 108, San Antonio, TX 78249, just minutes from UTSA, or claim a Viral Squishy Bundle online right now. However you squish, we have got you covered.